Since I purchased my King Canopy from Sams Club a few days ago, it's just been sitting in my basement, begging me to set it up in the backyard. Well, I could resist no further, so I took it out of the bag and assembled it for the first time.
It went up rather easily, though I did have a few issues. Of course, I was assembling it alone, so that made it a bit more difficult.
First issue I had was expanding the frame to the halfway point (first step in the instructions). I got it halfway to where I needed it, but then I couldn't get it to expand any further. Had I another person to help, it might have been figured out faster, because I initially just blamed the problem on the fact that I was really doing a 2 person job by myself. However, it ends up that wasn't the problem. It was actually just the sliding corner brackets getting hooked on the posts for the front awning. One I opened up the awning posts just a tiny bit, it went right up.
The second issue was more a case of my interpreting the instructions badly. The instruction told me to secure the corners of the roof with the hook and loop straps. That kind of confused me...I couldn't find any hooks anywhere, and the only loop straps I had were in the center of each side, not the corner. In the corners, all I had to secure it was Velcro...one half on the cloth, and the other half on the corner posts. Obviously, those had to connect together, but what was this other thing they were talking about? Well, after about 5 minutes of looking at the canopy and rereading the instruction, over and over again, I finally realized my mistake. "Hook and loop strap" is a generic term for Velcro.
The third issue appeared when I was securing down those Velcro loops in the center of each side. Each side had a pair of those loop, which you are supposed to unfasten, wrap around the frame, and refasten. Well, one of the loops on the front was accidentally caught by the sewing machine. As a result, it's now sewn into position. You can unfasten it, but you can't wrap it around the frame. I might give the manufacturer a call and ask them to replace the top for me.
The fourth issue was with putting up the walls. Mostly it was just a matter of learning the right technique to attach them, but I did have some problem with the zippers. First, it seemed like the sides were a little too short. That turned out to be a case of the legs simply being opened too far. However, when I got around to attaching the fourth wall (like I would when closing up for the night, I ran into a problem. The sides are made to just barely fit as it is, but with the addition inch or so for the front awning's bars on each side, the front ends up being about 2 inches too short.
I tried closing in the front leg more (to shorten the distance between legs) but that still didn't help. I managed to just barely get the zipper over the awning bracket when I could see the zipper starting to give way...almost ready to tear out from the stitching. I quickly undid it. As it stands now, I can zipper up 3 of the corners fine, but that 4th corner only attaches by the Velcro loops. That might work alright, but then again, water might get in there and hit my corner display rack (once I get one built) getting the cloth wet. I'm not sure what I'll do with this. Possibly make a small 2 or 3 inch strip with zippers on both sides to connect it.
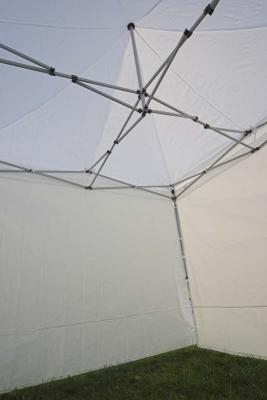
Heres a few pictures of the tent...one after being fully assembled (including the 4th side, but not the awning) and one on the inside.
I've left it sitting up overnight. I'll start construction on the display racks this weekend (I've already got most of the pieces sitting in my basement). I also have to test its ability to withstand water leakage and pooling.
Thursday, July 28, 2005
First assembly of my display canopy
Subscribe to:
Post Comments (Atom)


No comments:
Post a Comment