About a month ago, I received my new propanels to replace my old homemade panels made from electrical conduit + grid wire. I got to use them for 2 shows now, and I must say I like them a lot. They look so much more professional than the old burlap covers I made for the homemade panels. They setup so much easier, are more rigid, and a tiny bit lighter in weight. But the biggest thing I like about them is that Velcro sticks to the carpet. Even in just this short time, I've already realized that velcro (or more generically, hook and loop fastener...specifically the hook side) can be used for just about everything. In fact, I've already gone through a 75 foot roll of hook velcro and just ordered 2 more rolls.
Hanging artwork
When I got my panels, the first problem I needed to solve was how do I hang my work? I used to use curtain hooks that went through the burlap an over the grid wire. You can use the same on propanels, but they have no internal grid, so the hook is really just supported by the carpet. The problem here is that it will stretch the carpet out. From my understanding, that's not a problem because the carpet will return to normal after it sits. However I've seen it done and it looks a bit unattractive, because the picture leans out a bit and you can see it stretching away from the wall.
Another option is the hangers that you can buy with your propanels. They hang over the top and extend down as far as you need. I shot this down for a number of reasons. They cost a fair bit of money, they are a little limiting in how you hang photos, and they don't look as nice since you see the hanger running down the panel.
Instead, I thought I'd try a different approach: velcro.
Canvas wraps
Since I was going to be showing a number of canvas wraps this year, I figured "those are pretty light...what if I tried hanging them with velcro?". I went and got a roll of sticky backed velcro, attached it too back of the finished canvas wrap, and hung it. It worked like a charm. Easy to hang up and easy to take down. The sticky backing on the velro has excellent adhesion. However, just to be safe, I put 3 staples in each strip of velcro (one on each end, and one in the middle). The canvas is very secure. In fact, if anything I overdid it and made it too secure. It sticks to the wall so good, it takes a concerted effort to remove it (but still, no more than 5 seconds)
Here's a photo of the back on one of my canvases. As you can see, I put a strip of velcro across the top and bottom edge of the wrap, and then just a small peice on each edge. For as light as these canvases are, you could probably easily get away with only half as much velcro.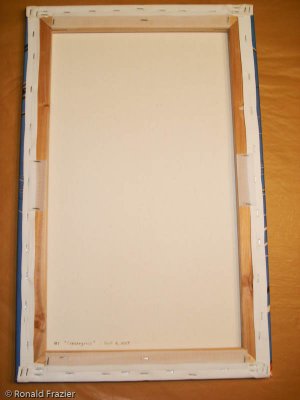
Back of a canvas with velcro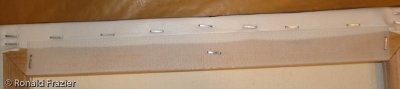
Closer look at the velcro
The thing I like most about this design is how easy it is to hangup frames in the booth. In 2 seconds I can have the frame right where I want it. In addition, the frame isn't going to shift when things get windy and the booth rocks...no more periodically straightening frames throughout the show.
Hanging wood frames
Well, I thought if this worked so incredibly well for wraps (which are just wood) they should work equally well for regular wood frames. My heaviest work is a 24x36 with acrylic instead of glass, so it only weights about 12 pounds. I did the same thing with my wood frames, and it worked like a charm. 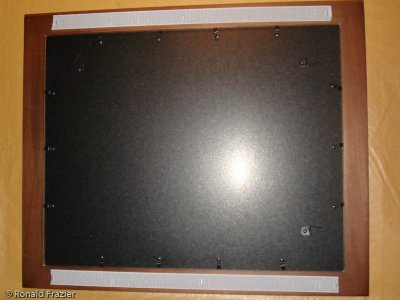
Wood frame with velcro
Pictured here is one of my 16x20's. It holds well with just the 2 sections of velcro. For my larger, more expensive pieces, I wanted to be extra careful so I put a lot of velcro on the sides as well.
Hanging metal frames
Now came the tricky part: hanging metal frames. With such a thin surface area to adhere to, and without being able to staple the velcro to the frame, I was extremely apprehensive about taking the same approach. After thinking about it a bit, I thought "what if I made a short piece of velcro and put curtain hooks through it". It would be just like the old way, except instead of piercing the hooks through the wall, I'd velcro the hooks to the wall.
In designing these, I had a few concerns. First, with the weight on such a small piece of velcro, I was concerned about it coming off. If I attached the hook up high on the velcro, the weight of the picture would in effect peel the velcro off from the top until the whole thing comes loose. If I instead attached the hook to the bottom of the velcro, the weight would pull the velcro down instead of peeling it off. Since the velcro doesn't easily slide across the carpet, that would solve that problem for all but the heaviest frames (much heavier than anything I display).
The other concern was that if I punctured the curtain hook through the velcro, the weight could cause it to tear through the velcro until it breaks loose. Of course, the velcro I'm using is quite tough, but still better safe than sorry. I decided to simply re-enforce the hole with a metal washer.
Making these hangers was quite simple. Cut 2 identical size pieces of adhesive backed velcro (one piece hook, the other loop). Take one piece and peel off the backing. Take a tiny metal washer and place it about 1/4 inch from one end. Then take the other piece of velcro, remove the backing, and stick it perfectly to the first piece. Once it's stuck together, it should be an extremely strong bond, and the washer should be firmly in place. Now take a curtain hook, puncture the velcro with the sharp end (making sure to puncture through the washer). You may need to use pliers to bend the hook some so you can put it through the velcro, and then bend it back to its original shape after it's assembled.
Now you've got your finished velcro hook. Just make a bunch of these, and use them to hang your frames (I use 2 per frame).
Parts needed (plus a curtain hook)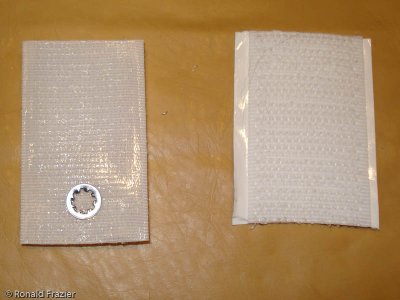
peel off the backing and place the washer
Carefully attach velcro, adhesive backings together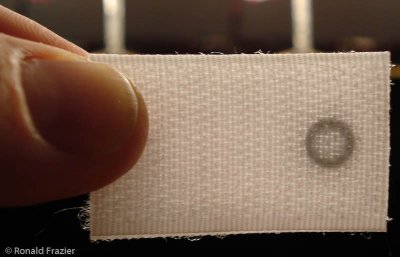
Finished strip, backlit so you can see the washer inside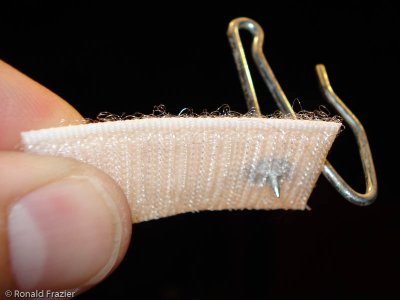
Puncture the hook through the washer (make the hook side is down)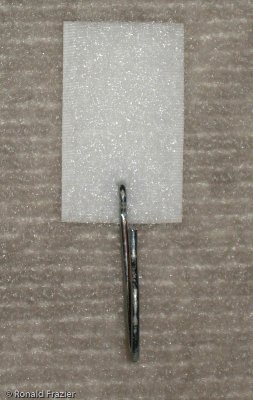
Finished piece on a propanel.
Getting these cut perfectly the same length so that none of the adhesive is exposed can be a bit tricky. What I found to work better was to make a dozen at once. Peel off a couple feet worth of loop velcro, stick a dozen washers to the back (evenly spaced every 2 inches), then attach the hook velcro to the back of it (peeling as you go, so that it doesn't accidentally get stuck to anything. When you are done, you have a 2 foot long strip. Cut it every 2 inches, near each of the washers.
Hanging everything else
Next I figured if I'm using Velcro for the heavy things, why not the light things, too? Anything that I wanted to put on display was promptly stuck with velcro. Price signs, credit card signs, information plaques, etc. Anything in my booth...if it was attached to my propanels, it was done with velcro (with one exception...my shelves where attached by shelf brackets, but I'm sure I could figure out how to velcro those too if I had the need).
Where to get velcro
I found my velcro cheapest on ebay. Look for 1" wide, adhesive backed, 25 yard (75 foot) rolls. If you buy 2 rolls together, you should be able to get them for about $20 a roll shipped. The first order I got 1 roll of loop and 1 roll of hook. I hardly used the loop, but I finished off the hook rather quickly, so my second time I ordered just 2 rolls of hook.
If you don't want to order through ebay, the company that I bought from sells direct. Their hook-and-look can be found at http://www.baerfabrics.com/hook-and-loop-fastener.asp
Friday, June 27, 2008
ProPanels - Velcro is the new duct tape
Subscribe to:
Post Comments (Atom)


2 comments:
It looks like you hang your frames without wires. So what do you do when you sell one? Add the hanging wires when the purchase occurs? Do you remove the velcro? And I see you don't use a paper backing on your wood frames. Aren't you concerned about dust getting into the glass.
Actually, most of them have wires on the back. I just ran out of eyelets and that one didn't have one yet. I knew someone was going to ask about that :-)
I don't paper any of my frames. With the matboard squeezed in there, it's sealed pretty tightly. I've never had a problem with dust getting in there.
Post a Comment