I've been working off and on for several weeks, picking out some of my favorite photos...the ones that I think are the best and have the most potential to sell. While I've certainly got some nice photos all finished up and hanging on my walls, I haven't gone back to re-finish those photos (double check the quality, set them up for easy automatic printing, etc). I guess I figured they were mostly done, so I'd rather spend my time looking for more photos and just come back to finish up those later.
In my searches, a few weeks ago I found a group of photos that I really like. They show various views of/from the Au Sable Point Lighthouse. I really like the photos together as a group. Maybe it's just nostalgia for the fact that my wife and I had to walk over a mile each way down a closed off service road just to get to the lighthouse...the extra effort required to get those shot gives them a special place in my heart. Or maybe its the fact that, after all that walking, when we got back to the car, the battery was dead and we had to flag someone down to give us a jump start in the middle of nowhere. Whatever it is, I felt there was something about these photos that, together, really told the story of this lighthouse.
So, at the time I loaded the files up really quick in MS Publisher and proofed the layout and configuration of the photos. When that worked well, I mocked up a double layered mat in Publisher and fooled around with color options.
Once I was convinced I had something worthwhile here, I immediately got to work fixing up those photos. The first step was to work on each of the individual photos, converting from CRW (canon raw) to TIFF format and post processing. The next step was to get the photos working together in a single TIFF file. This required cropping the images down to the required proportions (including some bleed around the edges), then resampling all images to a common DPI, sharpening each individually, and then copying them to the final image and positioning them relative to each other. The final step here was to work on the text...picking out the right fonts and sizes, choosing the wording, and creating the text layout.
Once the image was all set to go, it was time to print the image. Just one slight problem...the image I created was 11"x14". I do have some 13"x19" paper that I can just cut a slice off of (I've done it before) but the widest my Canon i950 can print is 8.5". Luckily, my image had a 1.5 inch border, leaving 8 inches of actual content. Add 1/4" for bleed to each side and you've got exactly 8.5". However, the next problem is that, in order to print the full 8.5" width you need to put the printer driver in borderless mode, and unfortunately (for who knows what stupid reason) borderless mode is only available for a few fixed paper sizes...not for custom sizes. Luckily (once more) my image had a bar of whitespace that spanned the entire width of the image about 2/3 down the page. This allowed me to break the image into a two 8.5"x11" halves. I just print the top half, turn the paper around 180 degrees, and then print the bottom half upside down.
The next step was to make a custom collage mat. My first try was a disaster...crooked lines, wrong measurements, and on top of that, I actually cut the mat backwards (mirror image). I didn't feel like taking another shot at it right away, so I went back to other things for over a week. Today, I decided to take one more stab at making the mat. This time it came out great, and I managed to get 2 double layer sets cut.
So here it is...a publisher/photoshop mock up of my first complete image ready for sale.
Au Sable Point Lighthouse
Pictured Rocks National Lakeshore
Au Sable Point, Michigan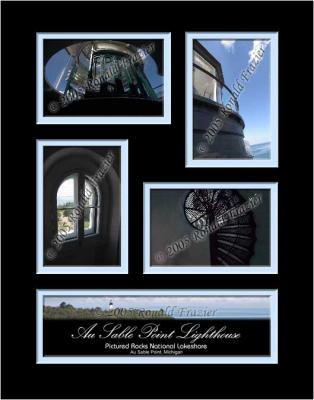
Tuesday, April 19, 2005
First photo ready for sale
Subscribe to:
Post Comments (Atom)


No comments:
Post a Comment